 SmartPicks
How to Set Up an Ergonomic Workstation (Full Guide)
Disclosure: this page contains affiliate links. If you buy through them, we may earn a commission at no extra cost to you. We only recommend products we would use ourselves.
Creating a comfortable, health‑friendly home office isn’t a luxury—it’s a necessity if you spend several hours a day at a desk. In this guide I’ll walk you through how to set up an ergonomic workstation that supports good posture, reduces fatigue, and keeps you productive, whether you’re on a tight budget or looking to invest in premium gear.
Why an Ergonomic Workstation Matters
I used to think a cheap chair and a laptop on the kitchen table were fine until I started feeling neck stiffness, lower‑back ache, and wrist tingling. Those symptoms are the body’s way of telling you the setup isn’t aligned with natural anatomy. Over time, poor ergonomics can lead to chronic musculoskeletal disorders, eye strain, and even decreased work output. A well‑designed workstation:
| Benefit | How it Helps You |
|---|---|
| Reduced Pain | Aligns spine, shoulders, and wrists to prevent strain |
| Improved Focus | Comfortable posture reduces distraction |
| Long‑Term Health | Lowers risk of repetitive‑stress injuries |
| Increased Efficiency | Easy reach to tools cuts unnecessary movement |
Understanding the why makes the what—and the how—much clearer.
Core Components of an Ergonomic Hub‑Style Setup
Think of your workstation as a cluster of three main “hubs”: visual (monitor), seating (chair), and input (keyboard/mouse). Lighting and accessories wrap around these hubs to fine‑tune comfort.
1. Monitor Height & Position
What to look for
- Adjustable stand or VESA mount – lets you raise, tilt, and swivel the screen.
- Screen size & resolution – larger, sharper displays reduce the need to squint or lean forward.
- Glare control – matte coating or an anti‑glare filter.
Key criteria
| Criterion | Why It Matters |
|---|---|
| Eye level | Top of the screen should be at or just below eye height; you’ll keep your neck neutral. |
| Viewing distance | About an arm’s length (20‑30 inches) prevents eye strain. |
| Tilt angle | A slight backward tilt (10‑20°) aligns the screen with your line of sight. |
Trade‑offs
- Fixed‑height desks limit monitor height; you may need a separate riser.
- Heavy monitors can be hard to move; a sturdy mount is essential.
- Ultra‑wide screens give more workspace but can require more desk depth.
2. Chair – The Foundation of Posture
What to look for
- Adjustable lumbar support – supports the natural curve of the lower back.
- Seat depth and height adjustments – lets you sit with feet flat and thighs parallel to the floor.
- Swivel and casters – easy movement without twisting the spine.
Key criteria
| Feature | Ideal Specification |
|---|---|
| Seat height range | 16–21 inches (adjustable in 1‑inch increments) |
| Lumbar height | Moveable up/down to match the small of your back |
| Backrest recline | 90–110° with lockable positions |
| Weight capacity | At least 250 lb for durability |
Trade‑offs
- Mesh vs. upholstered – Mesh breathes better but may feel less cushioned; upholstery feels plush but can trap heat.
- Budget chairs often lack multi‑axis adjustments, forcing you to compromise on posture.
- High‑end ergonomic chairs provide fine‑tuned adjustments but can be pricey; a well‑chosen mid‑range model can still hit the sweet spot.
3. Desk – The Work Surface Hub
What to look for
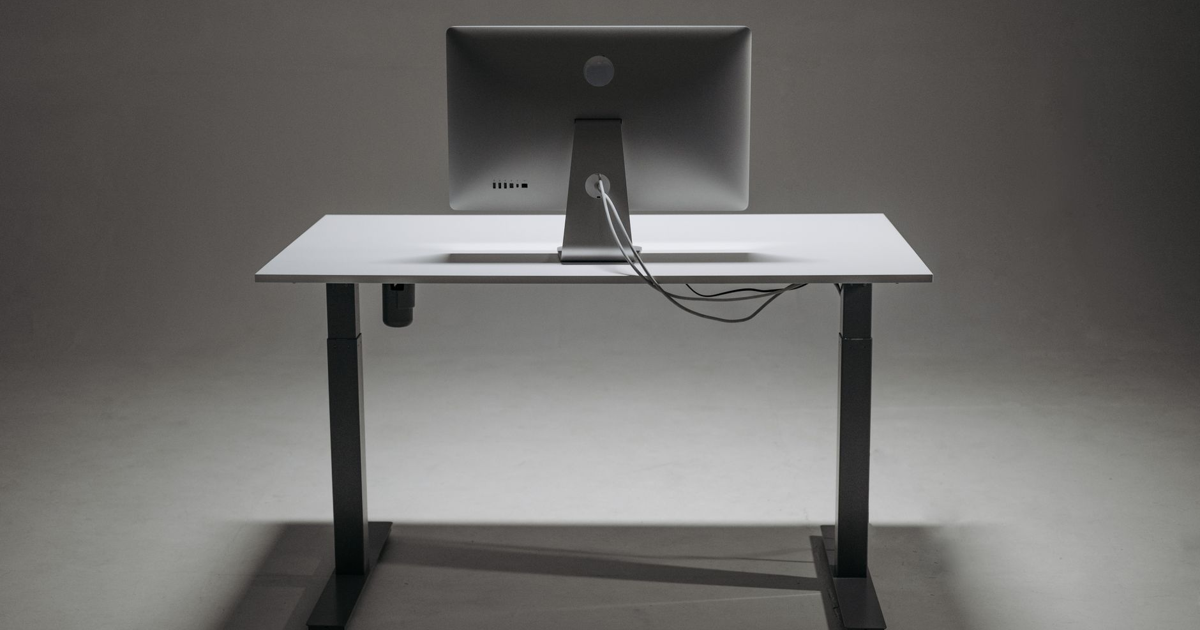
- Height‑adjustable (sit‑stand) capability – lets you alternate between sitting and standing.
- Sturdy surface – supports monitor weight and any accessories without wobble.
- Cable management – built‑in grommets or trays keep cords tidy.
Key criteria
| Criterion | Recommended Minimum |
|---|---|
| Desk depth | 24–30 inches (allows monitor at proper distance) |
| Desk width | 48–60 inches (enough for dual monitors or a large screen) |
| Weight capacity | 100 lb for a sit‑stand mechanism |
| Adjustable range | 24–50 inches (covers most user heights) |
Trade‑offs
- Fixed‑height desks are cheaper but lock you into one posture.
- Electric sit‑stand desks are smooth and programmable but require a power outlet and can be noisy.
- Manual crank desks are silent and affordable but slower to adjust.
4. Keyboard & Mouse – The Input Hub
What to look for
- Split or tented keyboards – promote a neutral wrist angle.
- Adjustable mouse height or vertical mouse – reduces forearm pronation.
- Low‑profile keys – require less finger extension.
Key criteria
| Feature | Why It Helps |
|---|---|
| Keyboard tilt | Adjustable legs let you keep wrists straight. |
| Mouse grip style | Palm, claw, or fingertip grips benefit from different mouse shapes. |
| Travel distance | Short key travel reduces finger fatigue. |
| Wireless vs. wired | Wireless offers freedom; wired eliminates latency and battery concerns. |
Trade‑offs
- Mechanical keyboards provide tactile feedback but can be louder; a quiet membrane option may suit shared spaces.
- Vertical mice feel odd at first; a gradual transition period is normal.
- Separate numeric keypad can free up desk space but adds another device to manage.
5. Lighting – The Unsung Hero
What to look for
- Adjustable desk lamp with color temperature control (warm to cool).
- Ambient lighting that reduces glare on the screen.
- Task lighting positioned to avoid shadows on the keyboard.
Key criteria
| Criterion | Ideal Setting |
|---|---|
| Brightness | 300–500 lux on the work surface |
| Color temperature | 4000–5000 K for a neutral, eye‑friendly light |
| Glare control | Position lamp to the side, not directly behind the monitor |
Trade‑offs
- LED lamps are energy‑efficient but may flicker at low dimming levels; choose a model with flicker‑free certification.
- Desk lamps with USB ports add convenience but can be bulkier.
- Floor lamps provide ambient light but may occupy floor space.
Assessing Your Space and Personal Needs
Before you start buying, I always take a quick inventory of the room:
1. Measure floor space – note the width, depth, and ceiling height. This tells you the maximum desk height and monitor size you can accommodate. 2. Identify power outlets – sit‑stand desks and LED lamps need easy access. 3. Check window placement – natural light is great, but avoid direct glare on the screen. 4. Consider your work style – do you need a large drawing surface, dual monitors, or a space for paperwork?
Once you have those numbers, match them against the criteria above. For example, if your ceiling is 8 ft, a desk that tops out at 50 in will still leave enough headroom for a monitor arm.
Common Mistakes (And How I Fixed Them)
| Mistake | Why It Hurts | Fix |
|---|---|---|
| Placing the monitor too low | Forces neck flexion → neck strain | Raise the screen so the top is at eye level; use a riser or adjustable arm. |
| Sitting on the edge of the chair | Reduces lumbar support, increases hip flexion | Adjust seat depth so you can sit back fully with a small gap (2‑3 in) between the back of your knees and the seat. |
| Using a mouse that’s too far away | Extends shoulder and forearm → tension | Keep the mouse within elbow‑height reach; consider a mouse pad with a wrist rest. |
| Ignoring lighting | Causes eye fatigue, headaches | Add a task lamp with adjustable brightness; position it to avoid screen glare. |
| Skipping the sit‑stand variation | Stays in one posture all day → circulation issues | Incorporate a sit‑stand desk or a separate standing converter; alternate every 30‑45 minutes. |
Step‑by‑Step: Putting It All Together
1. Set the desk height – Stand straight, let your arms hang naturally; the desk should be at elbow height (about 90° bend). If you’re using a sit‑stand desk, start with the sitting height and test a few minutes. 2. Position the chair – Adjust seat height so feet rest flat, knees at 90°. Slide the chair back until your lower back touches the lumbar support. 3. Mount the monitor – Raise it to eye level, tilt slightly back, and set the distance to an arm’s length. Use a monitor arm if you need extra flexibility. 4. Arrange keyboard & mouse – Place the keyboard directly in front of you, with the “B” and “G” keys under your elbows. Keep the mouse on the same surface, within easy reach. If using a split keyboard, align each half to your natural shoulder width. 5. Add lighting – Position the desk lamp to the left or right (opposite your dominant hand) to reduce shadows. Adjust brightness to a comfortable level; avoid harsh overhead fluorescents if possible. 6. Tidy cables – Run cords through grommets or a cable tray. A clean workspace reduces visual clutter and the risk of tripping. 7. Test and tweak – Spend a full workday using the setup. Note any discomfort and adjust height, tilt, or distance accordingly. Small changes (a 2‑inch monitor lift, a 5‑degree keyboard tilt) can make a big difference.
Matching the Setup to Your Budget and Needs
| Budget Tier | What You Can Expect | Typical Trade‑offs |
|---|---|---|
| Entry‑Level ($300‑$600) | Fixed‑height desk, basic ergonomic chair, monitor riser, wired keyboard & mouse, LED desk lamp | Limited adjustability; may need aftermarket accessories (e.g., separate monitor arm). |
| Mid‑Range ($600‑$1,200) | Manual or electric sit‑stand desk, adjustable lumbar chair, monitor with tilt stand, ergonomic keyboard, wireless mouse, dimmable lamp | Some premium features (e.g., memory presets on desk) may be missing; still offers solid adjustability. |
| Premium ($1,200+) | Fully programmable sit‑stand desk, high‑end ergonomic chair with multi‑axis adjustments, VESA‑mountable monitor with height/tilt/pivot, split/tented keyboard, vertical mouse, smart lighting system | Higher price, but maximum customization and durability. |
How I decide what to spend
- Primary pain points – If you already have chronic back pain, I prioritize a good chair first, even if it means a simpler desk.
- Work duration – For >6 hours/day, I invest in a sit‑stand desk to break up static posture.
- Future‑proofing – If you anticipate adding a second monitor or a drawing tablet, choose a desk with enough surface area and a monitor arm with a wide load capacity.
- Space constraints – In a small room, a wall‑mounted monitor arm and a compact chair can free up floor space without sacrificing ergonomics.
Quick Checklist Before You Buy
- [ ] Desk height range covers 24–50 in (or matches your height when seated/standing)
- [ ] Chair offers adjustable lumbar support and seat depth
- [ ] Monitor stand or arm allows eye‑level positioning
- [ ] Keyboard has adjustable tilt; mouse fits your grip style
- [ ] Lighting provides 300–500 lux with adjustable color temperature
- [ ] Cable management solutions are included or easy to add
- [ ] All components fit within your measured floor space
FAQ
Q: How often should I switch between sitting and standing? A: Aim for a 1:1 ratio—about 30 minutes sitting, then 30 minutes standing. Use a timer or a standing‑desk app to remind you.
Q: Is a standing desk really necessary for ergonomics? A: Not strictly, but alternating postures reduces static load on the spine and improves circulation. If a full sit‑stand desk is out of reach, a simple standing converter can achieve similar benefits.
Q: What’s the best way to reduce eye strain from the monitor? A: Keep the screen at least 20‑30 in away, adjust brightness to match ambient light, and use a 20‑20‑20 rule (every 20 minutes, look at something 20 feet away for 20 seconds). A matte screen or anti‑glare filter helps, too.
Our specific top picks and current deals are being added — check back soon.
Related guides
- How to Organize Your Desk (Best Organizers)
- How to Choose Blue Light Glasses for Screen Time
- How to Set Up Dual Monitors (What You Need)
SmartPicks — hundreds of picks, always the best price
We hand-pick quality products across 11 categories and compare every retailer, so you get the same quality for the lowest price. No hype, no paid placements — just honest picks.
Browse all products →