 SmartPicks
How to Choose Lighting for Video Calls
Disclosure: this page contains affiliate links. If you buy through them, we may earn a commission at no extra cost to you. We only recommend products we would use ourselves.
Getting the lighting right for video calls can feel surprisingly technical, but it’s really about a few simple principles: a clean key light, the right color temperature, and thoughtful placement relative to your webcam. In this guide I’ll walk you through the features that matter, the trade‑offs you’ll encounter, and how to pick a setup that fits your home‑office budget and style.
Why Lighting is a Game‑Changer for Video Calls
I used to think a decent laptop webcam was enough, but after a few awkward meetings—shadows under my eyes, a washed‑out background, and a flickering lamp—I realized that lighting is the silent partner that determines how professional you appear. Good lighting:
* Reduces shadows so facial features are clearly visible. * Creates color consistency between you and your background, avoiding the “orange‑skin” look that cheap bulbs can cause. * Improves camera sensor performance, letting the webcam use lower ISO and reducing noise. * Projects confidence, because a well‑lit face reads as more approachable and attentive.
The Core Lighting Elements for a Home‑Office Setup
Below is the typical lighting cluster I recommend for anyone who spends a significant amount of time on Zoom, Teams, or Google Meet.
| Element | Primary Role | Typical Placement | What to Look For |
|---|---|---|---|
| Key Light | Main source of illumination, defines the shape of your face | 45° angle from the webcam, slightly above eye level | Adjustable brightness, soft diffusion, decent CRI |
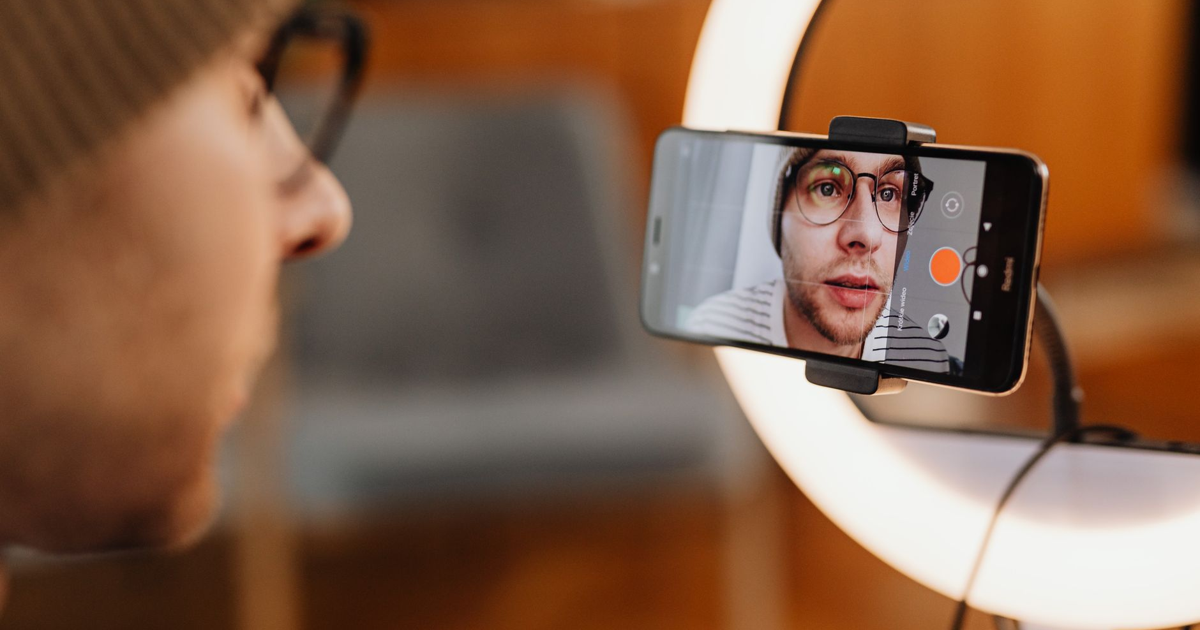
| Ring Light | Provides even fill and reduces shadows; also useful for streaming or content creation | Directly behind the webcam, centered on your face | Uniform light circle, adjustable color temperature |
| Fill Light (optional) | Softens shadows created by the key light | Opposite side of key light, lower intensity | Small desk lamp or LED panel, low wattage |
| Background Light (optional) | Separates you from the background, adds depth | Behind or to the side of you, aimed at the wall or shelving | Colored LEDs or bias lighting, controllable hue |
You don’t need all four for a basic video‑call setup; a key light plus a ring light covers most scenarios. The optional pieces become useful when you want a more “studio” feel or when you have challenging ambient lighting.
Key Features and Criteria to Evaluate
When I start comparing lights, I focus on a handful of specs that actually affect the webcam output.
1. Brightness (Measured in Lumens)
* Low (200‑400 lm): Good for small desktop panels or ambient lamps; may be insufficient if your room is dark. * Medium (400‑800 lm): Works for most home‑office desks; you can dial the intensity up or down. * High (800+ lm): Needed for larger spaces or if you want a very bright key light that can compete with daylight through a window.
2. Color Temperature (Kelvin)
* Warm (2,700‑3,500 K): Gives a cozy, indoor feel but can make skin look overly yellow. * Neutral (3,500‑5,000 K): Closest to daylight on an overcast day; generally the safest bet for natural skin tones. * Cool (5,000‑6,500 K): Resembles bright daylight; useful if your room already has a warm glow you want to balance out.
Most modern LED panels offer a bi‑color or tunable range (e.g., 3,000‑6,000 K) so you can match the temperature to the ambient light or your personal preference.
3. Color Rendering Index (CRI)
CRI measures how accurately a light source reproduces colors compared to natural daylight. Look for CRI ≥ 90 for video calls; anything lower can make whites look gray and skin tones look off.
4. Adjustability & Control
* Physical dials for brightness and temperature give instant feedback. * Remote or app control is handy if the light sits on a high stand or you want to switch settings without moving. * Barn doors / diffusion filters let you shape the beam and soften harsh edges.
5. Power Source
* AC mains – Most reliable, unlimited runtime, but you’ll need a nearby outlet. * USB‑C or USB‑A – Convenient for laptop‑powered setups; usually lower output, so check lumens. * Battery‑operated – Great for portability, but you’ll need to monitor charge levels during long calls.
6. Build Form Factor
* Desktop panels – Thin, can sit on your desk, often come with a magnetic base. * Boom‑arm mounts – Offer flexible positioning; great if you want the light out of the way when not in use. * Ring lights with a stand – Usually larger in diameter; provide a soft, catch‑light effect in the eyes, which is a subtle visual cue of engagement.
Placement Tips That Make a Real Difference
Even the best light looks bad if it’s positioned poorly. Here’s how I set up my own webcam lighting.
1. The 45‑Degree Rule for the Key Light
Place the key light about 45 degrees to the left or right of your webcam, and slightly above eye level (roughly 15‑20 degrees). This angle:
* Highlights the contours of your face. * Reduces the “flat” look that occurs when the light is directly in front. * Keeps the catch‑light (the small reflection in your eyes) natural.
If you’re left‑handed and tend to look more toward the camera’s right side, consider mirroring the key light to the opposite side for a balanced look.
2. Ring Light Placement
A ring light is most effective directly behind the webcam, centered on your face. Because the light wraps around the lens, it fills in shadows from the key light and creates a subtle, even illumination. Keep the ring about 6‑12 inches away from your face; too close can cause a flat, overly bright effect, while too far reduces its fill power.
3. Managing Background Light
If your background looks cluttered or you want a subtle separation, add a low‑intensity bias light aimed at the wall behind you. A soft LED strip or a small panel set to a cooler temperature (5,500 K) can create a pleasant contrast without stealing focus.
4. Controlling Ambient Light
Whenever possible, turn off harsh overhead fluorescents or direct sunlight that creates strong shadows. If you can’t, use curtains or a diffuser to soften the incoming light, then let your key and ring lights become the dominant sources.
Trade‑Offs to Consider
Choosing lighting isn’t just about “bigger is better.” Below are the most common compromises I’ve encountered.
| Trade‑off | What You Gain | What You Lose |
|---|---|---|
| Size vs. Desk Space | Larger panels deliver smoother, more even light. | They occupy more desk real estate; may require a boom arm. |
| Power vs. Heat | Higher wattage (or higher lumens) gives brighter output. | More heat, which can be uncomfortable if the light sits close to you. |
| Price vs. Color Accuracy | Premium lights often have CRI ≥ 95 and smoother dimming curves. | Budget lights may have CRI ≈ 80‑85, resulting in less natural skin tones. |
| Fixed vs. Adjustable Temperature | Fixed‑temp lights are cheaper and simpler to set up. | You lose flexibility to match changing daylight conditions. |
| USB Power vs. AC Power | USB lights are portable and cable‑friendly. | They may not reach the brightness needed for a well‑lit face. |
Understanding where you sit on each axis helps you avoid overpaying for features you’ll never use (e.g., a high‑CRI light when you only need a basic desk lamp) and prevents under‑spec’ing (e.g., a 200‑lm light in a room with bright windows).
Common Mistakes and How to Avoid Them
1. Relying on Overhead Lighting Alone Problem: Fluorescent tubes create uneven, often colored wash. Fix: Add a dedicated key light; even a modest LED panel dramatically improves clarity.
2. Positioning the Light Too Close to the Camera Problem: The subject appears washed out, and the camera’s auto‑exposure may over‑compensate, darkening the background. Fix: Move the light a foot or two away, and use a diffuser if the beam feels harsh.
3. Ignoring Color Temperature Matching Problem: Mixing warm desk lamps with cool daylight leads to a “two‑tone” face. Fix: Choose a light with a tunable temperature and set it to match the dominant ambient light.
4. Over‑brightening the Background Problem: The background competes with your face, making you look recessed. Fix: Keep background lights low, and use a subtle bias light instead of a strong flood lamp.
5. Neglecting the Camera’s Field of View Problem: Light placed too far left or right may be cut off in the webcam’s frame. Fix: Before you finalize placement, open a test video call and check the entire frame for any light spill or shadows.
Matching Lighting to Your Budget and Needs
Below is a quick decision matrix I use when advising friends.
| Scenario | Recommended Light Type | Approx. Budget Range* | Reasoning |
|---|---|---|---|
| Basic remote work (occasional calls) | Small desk‑top LED panel or USB ring light | Low | Enough brightness for a tidy look; minimal footprint. |
| Frequent meetings + occasional streaming | Bi‑color panel with adjustable stand + medium‑size ring light | Mid | Flexibility to tune temperature; enough power for longer sessions. |
| Full‑time video‑presenter or content creator | High‑CRI, high‑lumens panel with boom arm + large ring light with remote control | High | Professional‑grade color rendering, precise control, and separation of key/fill lighting. |
| Space‑constrained desk | Clip‑on key light + small ring light that mounts on the webcam | Low‑to‑mid | Saves desk space while still providing two‑light setup. |
| Eco‑conscious user | Energy‑efficient LED panel powered via USB‑C, with a timer feature | Low‑mid | Reduces power draw; USB‑C eliminates extra cords. |
*Budget ranges are relative descriptors (low, mid, high) rather than specific numbers, keeping the guide evergreen.
When you decide on a tier, start with the most impactful element—the key light. If you have room in the budget, add a ring light for fill. Optional background or fill lights can be introduced later as your workflow evolves.
Quick Setup Checklist
- [ ] Determine ambient lighting (window direction, overhead fixtures).
- [ ] Select a key light with ≥ 90 CRI and adjustable brightness.
- [ ] Set the key light at a 45° angle, slightly above eye level.
- [ ] Add a ring light centered behind the webcam, 6‑12″ away.
- [ ] Choose a color temperature that matches the room (neutral 4,000‑5,000 K works for most).
- [ ] Test on a video call; adjust brightness/position until shadows disappear and the face looks natural.
- [ ] Fine‑tune background with a low‑intensity bias light if needed.
- [ ] Secure cables to avoid tripping or accidental unplugging.
Running through this list once will give you a reliable, repeatable lighting setup for any virtual meeting.
FAQ
Q: Do I really need a separate key light if my laptop has a built‑in webcam light? A: Laptop lights are usually too dim and positioned too low, creating shadows under the chin. A dedicated key light adds enough illumination to let the webcam capture a clean image without noise.
Q: Should I use a warm or cool light for a professional appearance? A: Aim for a neutral temperature (3,500‑5,000 K). It mimics natural daylight, rendering skin tones accurately and keeping the background from looking overly yellow or blue.
Q: How can I reduce glare on glasses during a video call? A: Tilt the key light slightly upward and use a diffuser or a softbox attachment. If you wear glasses, position the light so the beam hits the bridge of your nose rather than directly reflecting into the lens.
Our specific top picks and current deals are being added — check back soon.
Related guides
- How to Choose a USB-C Hub for a Home Office
- How to Set Up Cable Management for Your Desk
- How to Choose a Laptop Stand for Your Desk
SmartPicks — hundreds of picks, always the best price
We hand-pick quality products across 11 categories and compare every retailer, so you get the same quality for the lowest price. No hype, no paid placements — just honest picks.
Browse all products →